Bomber Commando

Top Down Map
Introduction
The Bomber Commando project is a top-down action and adventure game I created to improve my understanding of the AI system in Unreal Engine and work with an atypical camera view and asymmetric paths through the level. I designed a city center for the game that enemies have taken over. These enemies brought supplies and used the block as a staging area. Due to the attacks, there is rubble everywhere, and no forces can respond to the invasion. The player must remove enough rubble for the support forces to reclaim the city. Throughout the block, several civilians and critical medical supplies have been trapped by the enemy and debris. The civilians and supplies add a layer of optional objectives the player can work on while meeting the main objective.
Game Story
Luke Aukland, a commando, has been tasked with clearing a path through a devastated city. Snipers hide in various buildings and have explosives and health packs that Luke will need to complete the mission. Luke can also use the explosives to clear roads and rubble. Within the ruins, there are trapped civilians and discarded medical supplies. Using his drone, Luke can rescue the civilians and recover supplies. To proceed, Luke has to clear a path through the city.
Mechanics
Destructible Rubble
Groups of rubble prevent the player from progressing without demolition packs. The player starts with two (2) packs and can carry up to five (5) of them. The only way to secure more demolition packs is to kill the enemy snipers throughout the level.
Sniper Enemies
The snipers are the primary pressure to push the player through the various paths in the level. Three to four snipers are waiting in each section of the city. The player must use their drone to attack the snipers and recover any demolition packs and health kits they have. The demolition packs have a 100% drop rate, and if the player is at maximum capacity, the extra will be left on the ground for the player to come back and pick up. There is a 50% chance the snipers will drop a health kit.
Rescuable Civilians
Throughout the city, civilians have become trapped by the insurgents and must be rescued. Each path has at least one (1) civilian surrounded by crates and rubble. Once the player reaches a civilian, a drone is called in to carry them to safety.
Recoverable Supplies
Similar to the civilians, there are medical supplies that the insurgents have captured. Once the player can reach them, a drone is called to recover them.
Mechanic Deep Dive
Sniper Mechanic
Level Design Document
Level Design Concepts

Color Language
All the colors used throughout the level stand out compared to the buildings, streets, and sidewalks. These colors help the player understand what is safe and helpful and what will hurt them. In the image, I labeled most of the colors in the level. The blue, green, and brown are safe colors. The red and orange indicate danger. In the case of the demolition packs, the pickup is the same color as the pack that attaches to the rubble and can cause the player damage.
Leading Lines
The level has many leading lines to guide the player through the different paths and help them reach the end goal. The image shows the location of every sniper the player can encounter, surrounded by the red squares and all the leading lines, green arrows, that push them into their range and provide a path to escape before taking damage. Along the northern road, the lines attempt to show that the player can continue along the road or divert to the other roads.


Breadcrumbs
In the image, the purple box shows how much of the map the player can see as they move around. Each screen should have at least one breadcrumb or leading line to guide the player to the next breadcrumb. In my level, there are three types of breadcrumbs. The first is the snipers, who have the red box around them. The second is the civilians who have the blue triangle around them. Lastly, the medical supplies are the ones that have a blue box around them. When laying out the level, I aimed to ensure that each area the player could see would have another breadcrumb to guide them along as they progressed through the level.
Level Showcases
Final Blockmesh
Blockmesh Showcase Video
Final Level with all Mechanics
Final Mechanics Video
Project Retrospective
What went right
Grouping Rubble for Removal
While designing the rubble mechanic, I wanted to create dynamic elements that the player could encounter without crafting each location by hand. After I made the base rubble blueprint, the next step was to remove them all with a single explosion. To remove all the linked rubble, I exposed an array, intending to add any other rubble in the group to that array. The setup took a little time for each grouping, but no matter which piece of rubble the player interacted with to place the explosive pack on, the explosion function would remove all the rubble simultaneously.

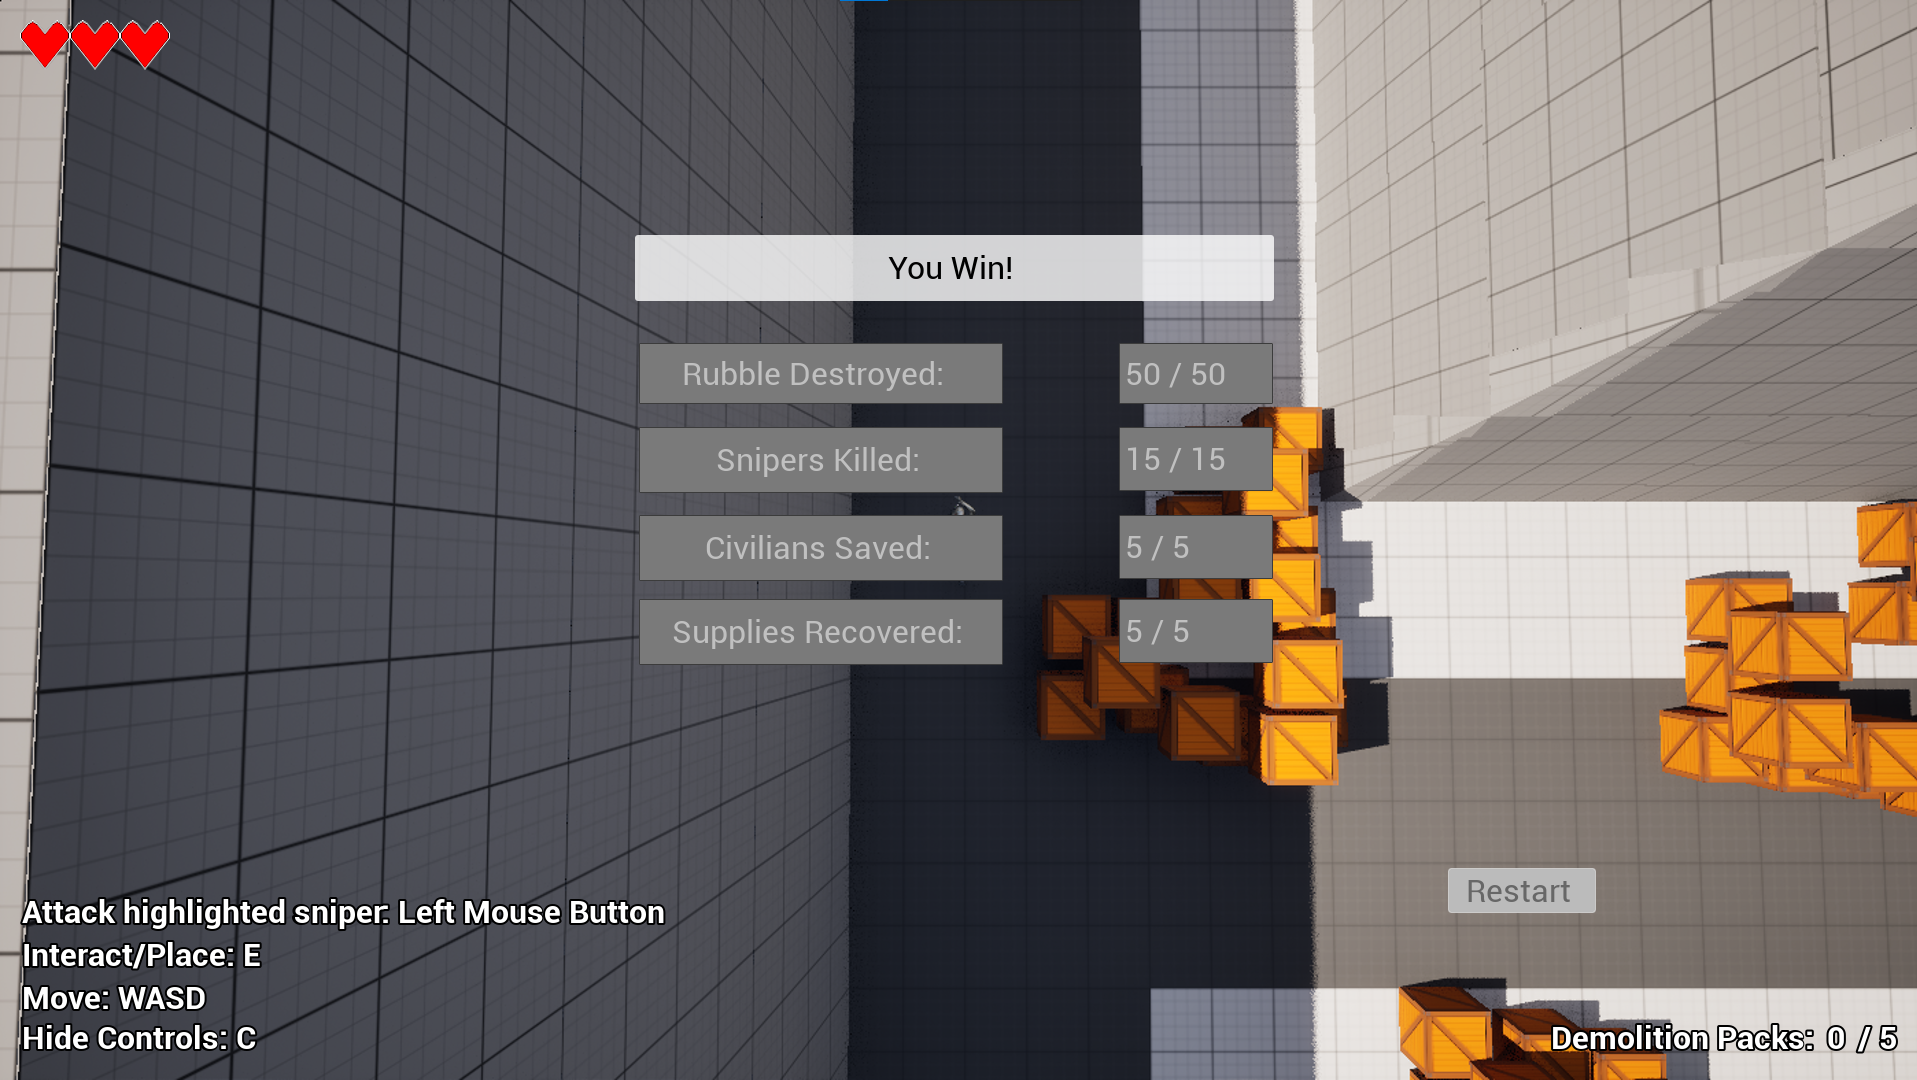
Game Metrics
Data is one of the most critical pieces of feedback a game designer can have for their level. Most players will go through a game and never tell you what parts they liked, which ones they got stuck on, or even what bugs they encountered. This gap in feedback is where game metrics come in. Tracking key points within a level and game can give the designer information on how a person played the game without needing personal information. Having the data can show what can be improved within the game, which can solve frustrations. To that end, I created a metrics system that collected four key elements from my level and presented them on the end screen to see how the playtesters progressed in a win or lose scenario.
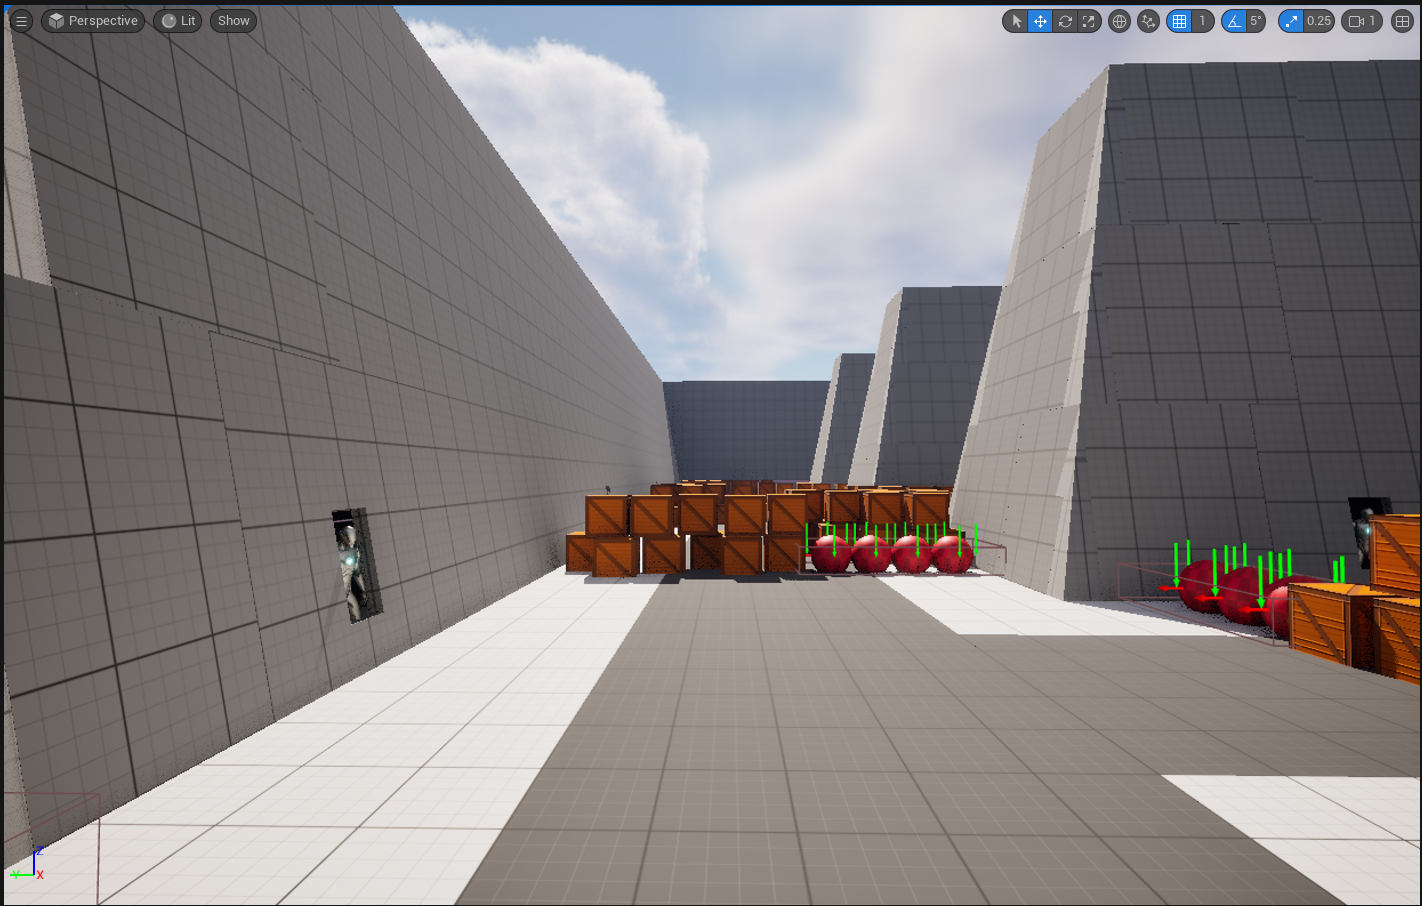
Asset Angling
When I chose to create my game from a top-down perspective, I was worried that I would not have enough space to build a city and add enemies. To give myself access to all four walls of the building, I angled them by 10 degrees to provide the illusion of the buildings being straight up and down. That angling allowed me to put windows on any side where the enemies could peek out and gave me room to guide the player through the level with various level design concepts.
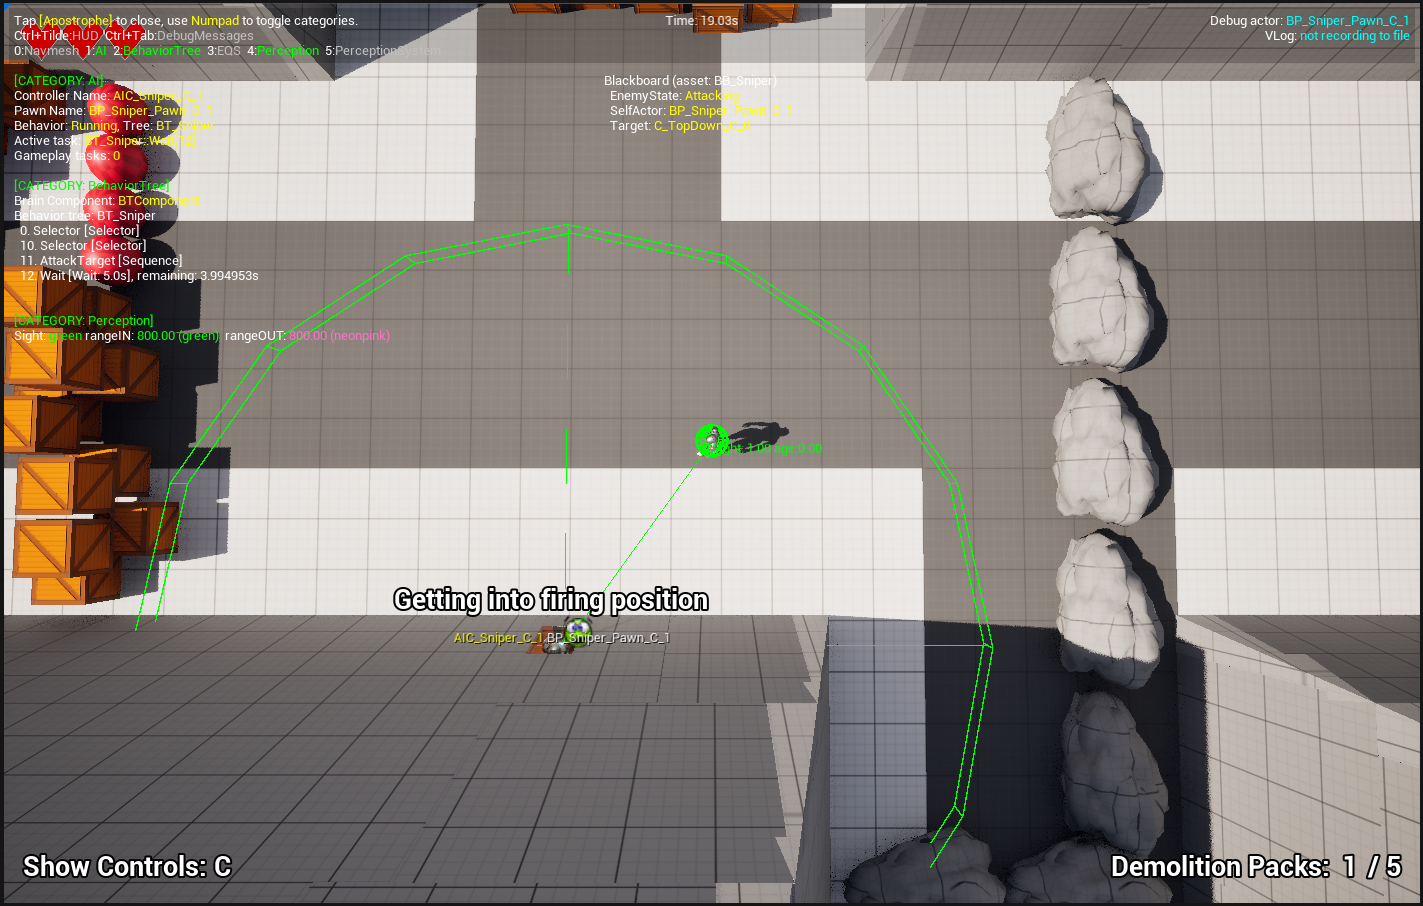
AI Targeting
The design for how the AI and character would target each other was challenging. I wanted the enemy to have an 800-unit range and start forgetting the character as soon as they left that range. I wanted the same range as the enemy for the character, but I wanted to avoid using line traces if I could. I decided to use the AI Perception system with a bare behavior tree for the enemies, and when they would see or lose sight of the character, the AI Controller would send a message to the character blueprint so it would know which enemy was targeting them and if they were in range. Because only one enemy could target the player at a time, these messages allowed easy access to the closest enemy and whether they were in range.
Enemy Loot
I wanted to give the players a reason to eliminate the enemies in the level. To achieve this, I placed 17 piles of rubble that the player could destroy with demolition packs and gave them two at the start of the level. I also positioned 15 snipers evenly throughout the level and set up the elimination logic to provide the player with one demolition pack for each sniper eliminated. This design meant that at least one enemy would need to be eliminated to complete the level and would teach the player how to get more demolition packs. I also added a 50% chance that the snipers would return a health pack to the player to heal any damage from the snipers.
What went wrong

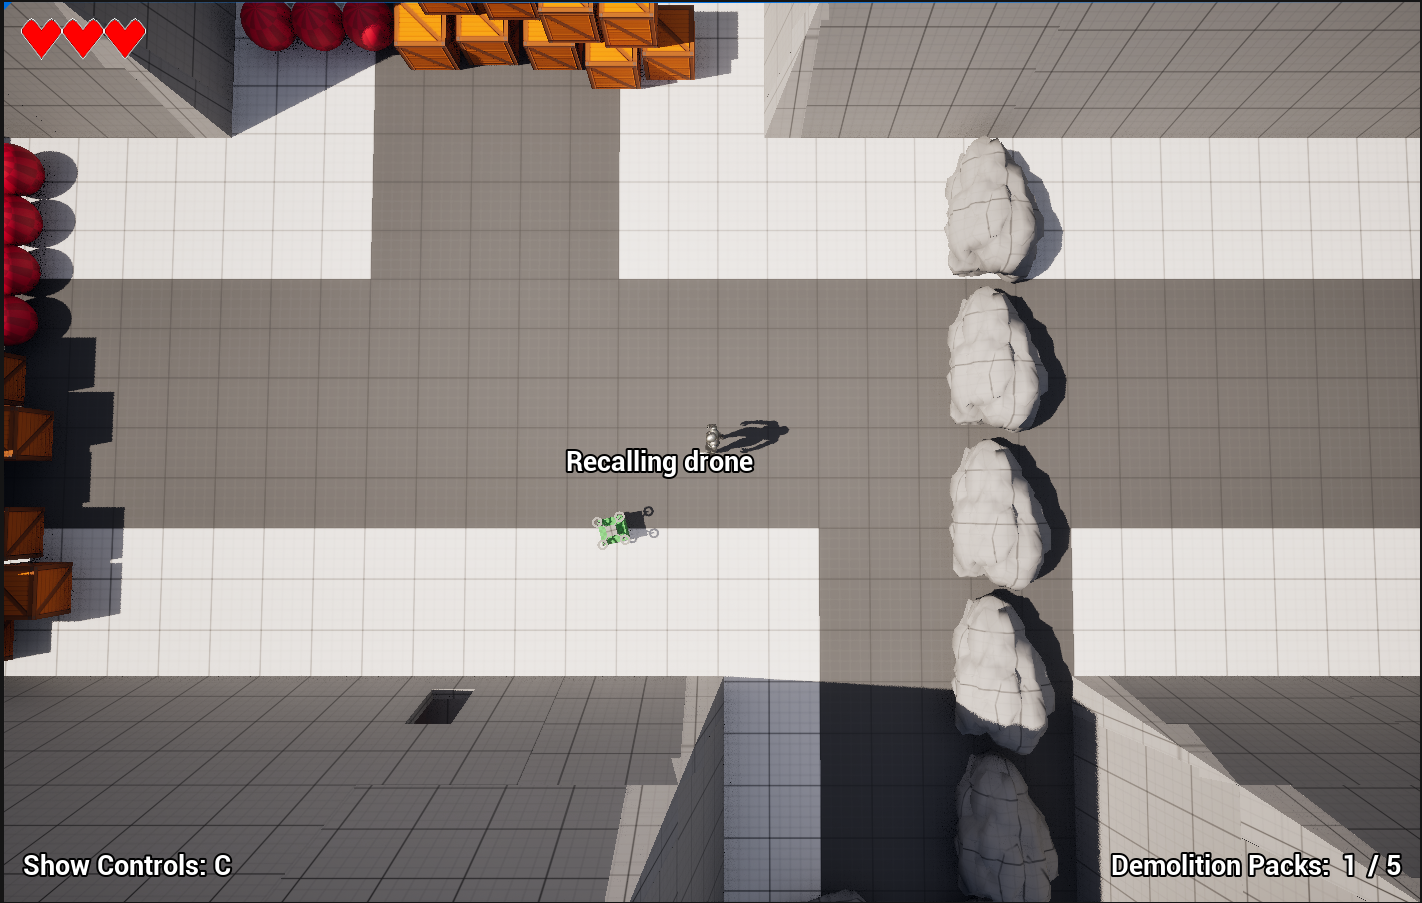
Drone Spawning
Trying to find the best way to spawn in the character’s drone so it could attack the sniper took time to get it working. Even with all of the modifications, there are still issues with the spawning if the character has boxes on each side of them. While I could redesign the level, I believe continuing to work on how the drone spawns is the correct way to solve the problem. Currently, there are two spawn points around the character. Each point has a sphere collision setup to check for anything blocking the path. The next step involves calculating each available point's distance from the target. Once the best point is chosen, the drone spawns and uses the Navigation Mesh to path to 100 units in front of the target and then returns with loot. The multiple spawn points are because the character does not cut out a hole in the Navigation Mesh, which means the drone attempts to path through the character to reach the target. The delay in the drone reaching the target could mean the character's death.
Group Interaction of Rubble
The initial design of the rubble included four cube collision zones turned 45 degrees so the player could place a demolition pack on the facing closest to them. The problem I encountered was how the player would interact with each piece of rubble and get the interaction message to stay on the UI consistently. I solved this by leveraging the existing group settings and creating a single cube collision zone per piece of rubble. I then made a variable that was false by default, which disabled the interaction zone. That allowed me to enable a single zone for the entire group that I could resize to fit around the rubble. I did have to add calculations into each part of the group to determine which spawn point was closest to where the character was standing so the pack reacts like the player thinks it should.

AI Movement
As mentioned in the Drone Spawning feedback, how the Navigation Mesh interacts with the player added complexity to the drone's design and its navigation around the map. The original intent was for the drone to appear above the player, fly toward the enemy, and buzz around a little before returning. The first issue I encountered was having an actor that would interact with the Navigation Mesh and be at least 200 units above the ground. Because the drone had to be a child of the Character blueprint class, the capsule component had to be at ground level to move around. I could not find a combination of collision settings that allowed the capsule to pass through the character and crates but not fall through the floor. This issue left me placing the drone on the ground, working around the Navigation Mesh's problems, and adding additional spawn locations to the Character blueprint.
Balancing Safe vs Dangerous Zones
Designing the paths through the level provided a challenge. Each location with an enemy had to have enough crates to give the player cover as they approached but also push them into the range of the snipers. There also had to be enough crates to keep the player there for at least 2 seconds before they could begin running out of range. The goal was to enhance the tension around the enemies because there were not enough crates or other obstacles in the first few iterations so that enemies could be bypassed entirely, and the player had nothing pushing them through the level, breaking the flow.

Ineffective Player Feedback
For the player feedback, I used flying text over the object to draw the player's attention. I split the playtesters into two groups to see how well I set the feedback up. The first play testers had difficulties with the range of the enemy and the player because crucial lines of text were missing. After watching the playthroughs I added text when the player was out of range to send the drone and when the drone could not deploy because objects blocked the spawn points. These changes helped the second group better understand how to use the drone, but one other piece of feedback was adding color to the text to show the player the message's severity.
Conclusion
Overall, I am pleased with the level's design, the mechanics I created, and the testers' response to the game. In a second game revision, I will implement most of the feedback items I received. Once the mechanics are well-tuned, I plan to replace the block mesh with production-quality meshes, animations and sounds to finish bringing this world to life.